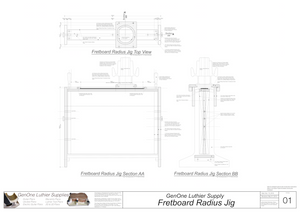
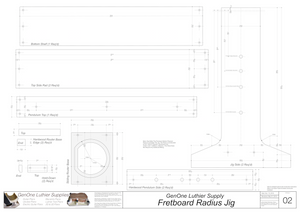
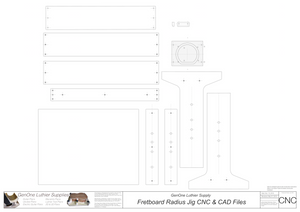
Many luthiers find that placing the proper radius, both evenly or consistently into the fretboard one of the most difficult tasks of the build. Even with radius blocks there is endless sanding, on very hard wood, with mixed results. Since almost all electric guitars and most acoustic instruments require a fretboard with some degree of radius, this is a task we face with just about every guitar that is made.
Also, some of the more sophisticated electric and bass guitars require a compound radius, which is a constantly changing radius dimension from the nut to the body. How do you do that with sanding blocks, without making a mess of your expensive fretboard?
I have been working on a solution for a jig to place an even, very consistent radius' on the fretboard, both quickly and precisely, and the GLS Fretboard Radius Tool is the result of years of trial and error.
Note: As ALL of our plans are sold as digital downloads, when you complete your plan purchase with us, you will automatically be given a download link to access the plans.
Prepare the fretboard: Start by cutting it about 1/2"+ longer than necessary. Taper the fretboard and sand the back (the side that glues to the neck. Cut the fretboard thickness slightly thicker than the depth to the crown (about 1/32" is enough) and cut the Fret Channels in the fretboard.
Place double-stick tape on the backside to prevent the thin fretboard from bowing in the middle. Next, secure the fretboard to the top of the pendulum of the jig, being careful to exactly center the fretboard. Clamp the fretboard with the (2) end cleats on the jig.
The jig allows very simple adjustment for radius selection. Just place the axis point dowel in the proper radius hole and you are all set. Want a compound radius? Place the dowels in different locations on each side of the jig and you will get a precisely cut compound radius.
Set the sliding router base on the jig. Adjust the router bit depth to contact the fretboard with the pendulum centered and slide the router to the nut side of the fretboard. Start the router. Next, with one hand slowly move the sliding base toward the opposite end of the fretboard, while at the same time move the pendulum back and forth. This is what puts the radius on the board. The key is to move the base slowly for the most even cuts. This takes only 3 or 4 minutes.
The result is a perfect fretboard with a extremely precise radius cut. Just trim the fretboard to length and sand the fretboard very lightly to remove and minor inconsistencies from the bit.
You can cut a radius of almost any dimension you like with this jig. Besides the standard radius cuts we have on the drawing you can make your own custom radius cuts as well - even varying the compound radius.
Here are the standard radius cuts setup on the jig:
7.25" (184.15mm) Vintage Strat
9.5" (241.30mm) Modern Strat & Tele
12" (304.80mm) Most Gibson Electric & Acoustic Guitars
16" (406.4mm) Martin Acoustic Guitars
Maximum fretboard width for the jig is approximately 82mm or 3-1/4" when using a 3/4" (19mm) bit.